Dalfox MCP Mode
New (v2.11.0)
Overview
Model Context Protocol (MCP) mode allows Dalfox to operate as an MCP server, enabling direct integration with AI assistants and language models (LLMs). This integration provides a seamless experience for security testing, allowing AI tools to directly leverage Dalfox’s XSS scanning capabilities.
What is Model Context Protocol (MCP)?
Model Context Protocol is a specification that allows AI language models to interact with external tools. By running Dalfox as an MCP server, AI coding assistants can:
- Initiate XSS vulnerability scans
- Process scan results within the AI conversation
- Help interpret security findings
- Suggest remediation steps
Starting Dalfox in MCP Mode
To run Dalfox as an MCP server:
dalfox server --type mcp
Client Integrations
Visual Studio Code
VS Code provides robust support for MCP tools when used with AI coding assistants like GitHub Copilot or other MCP-compatible extensions.
Configuration Steps
- Install Dalfox (if not already installed)
# From source go install github.com/hahwul/dalfox/v2@latest # Homebrew brew install dalfox # Snapcraft snap install dalfox -
Configure VS Code settings
To enable the dalfox server in VS Code, update your
settings.jsonfile with the following configuration:{ "mcp": { "servers": { "dalfox": { "type": "stdio", "command": "dalfox", "args": [ "server", "--type=mcp" ] } } } }This setup defines a server named dalfox that uses standard input/output (stdio) and runs the command
dalfox server --type=mcp. You can manually add the server by pressing⌘+⇧+p, selecting MCP: Add Server, choosingCommand (stdio), and enteringdalfox server --type=mcpin the input field. This ensures seamless integration of the dalfox server with your VS Code environment. -
Use with AI assistant
Now your AI coding assistant can directly use Dalfox to scan for XSS vulnerabilities. For example, you can ask:
"Can you scan this URL for XSS vulnerabilities using Dalfox?"
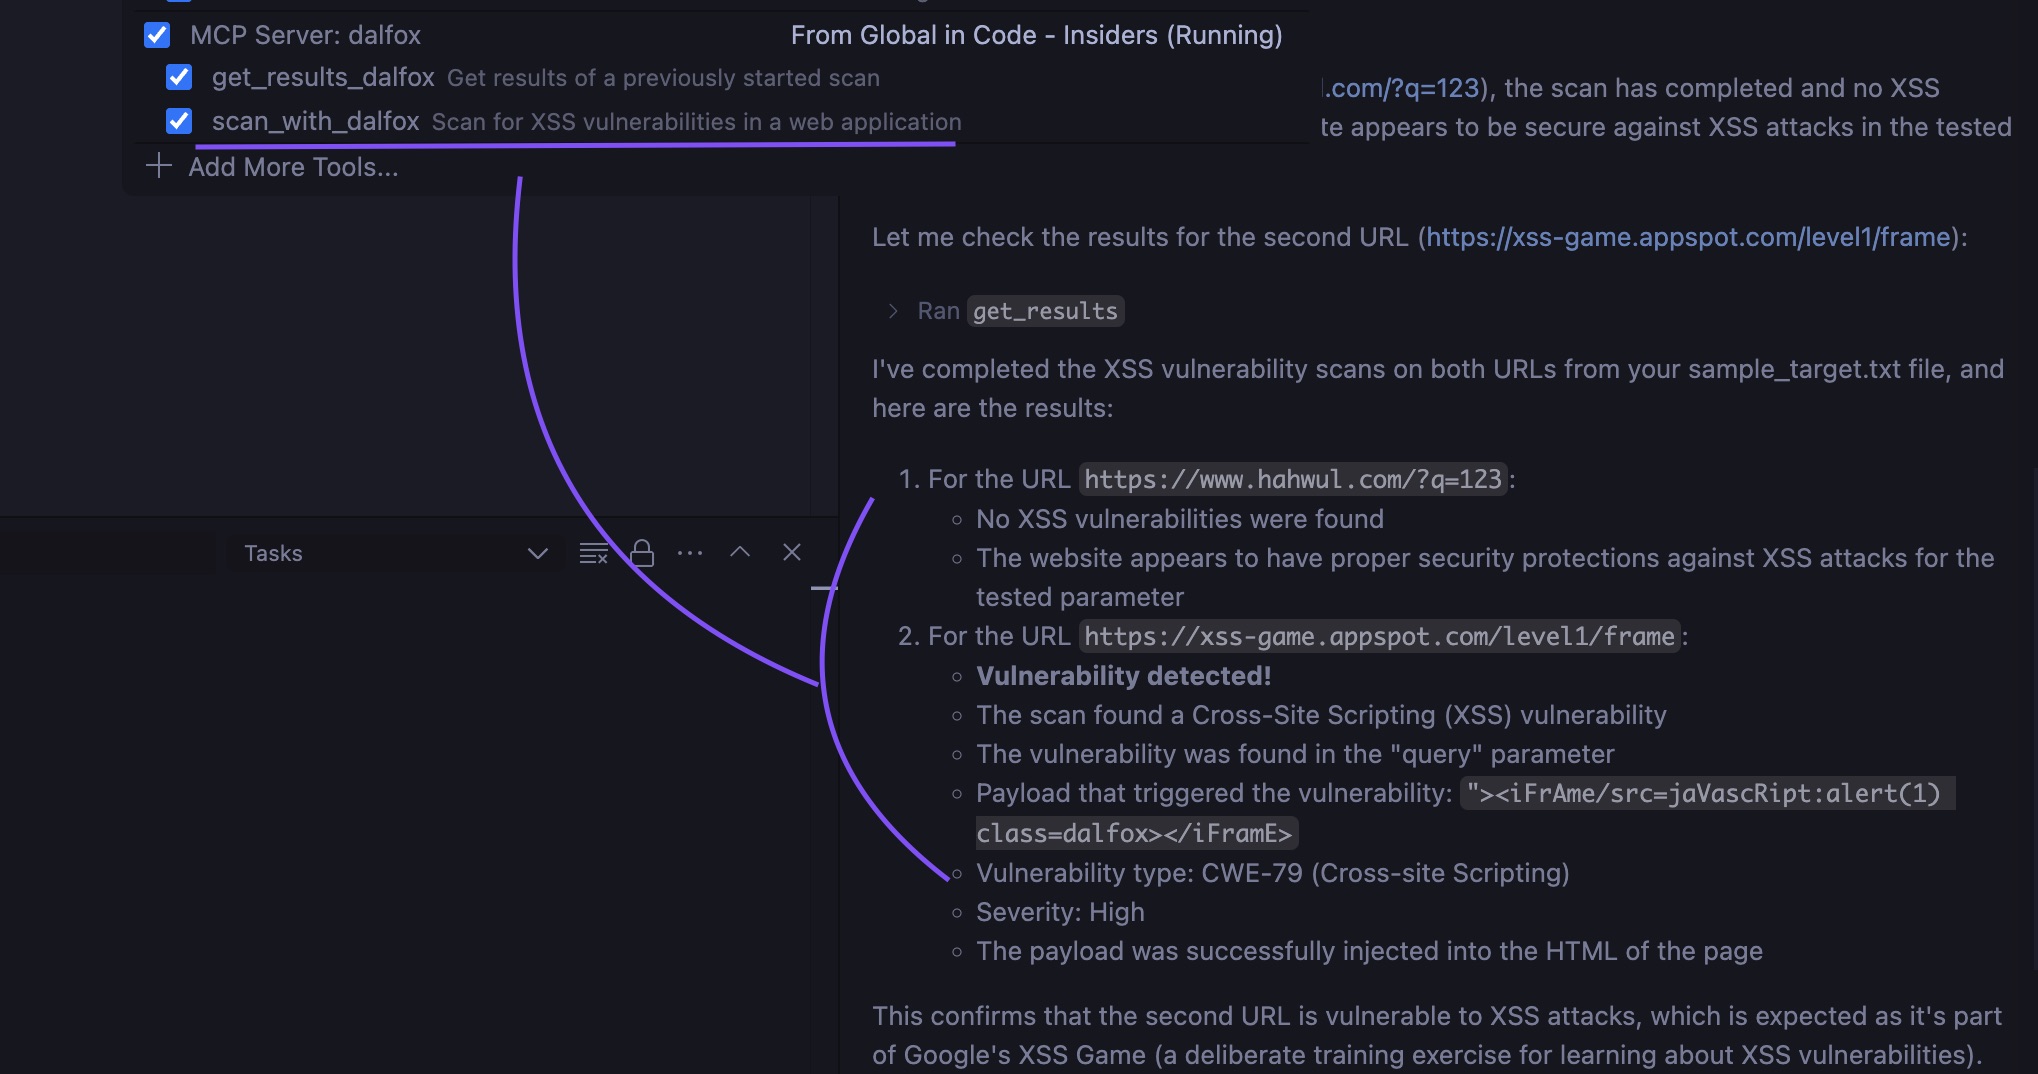
Example VS Code Usage
Claude Desktop
Claude Desktop is Anthropic’s standalone application that can integrate with external tools using the MCP protocol.
Configuration Steps
- Install Dalfox (if not already installed)
# From source go install github.com/hahwul/dalfox/v2@latest # Homebrew brew install dalfox # Snapcraft snap install dalfox -
Configure Claude Desktop settings
{ "mcpServers": { "dalfox": { "command": "dalfox", "args": [ "server", "--type", "mcp" ] } } } -
Use with Claude
You can now use Dalfox directly through Claude’s interface:
"Can you scan https://xss-game.appspot.com/level1/frame for XSS vulnerabilities"
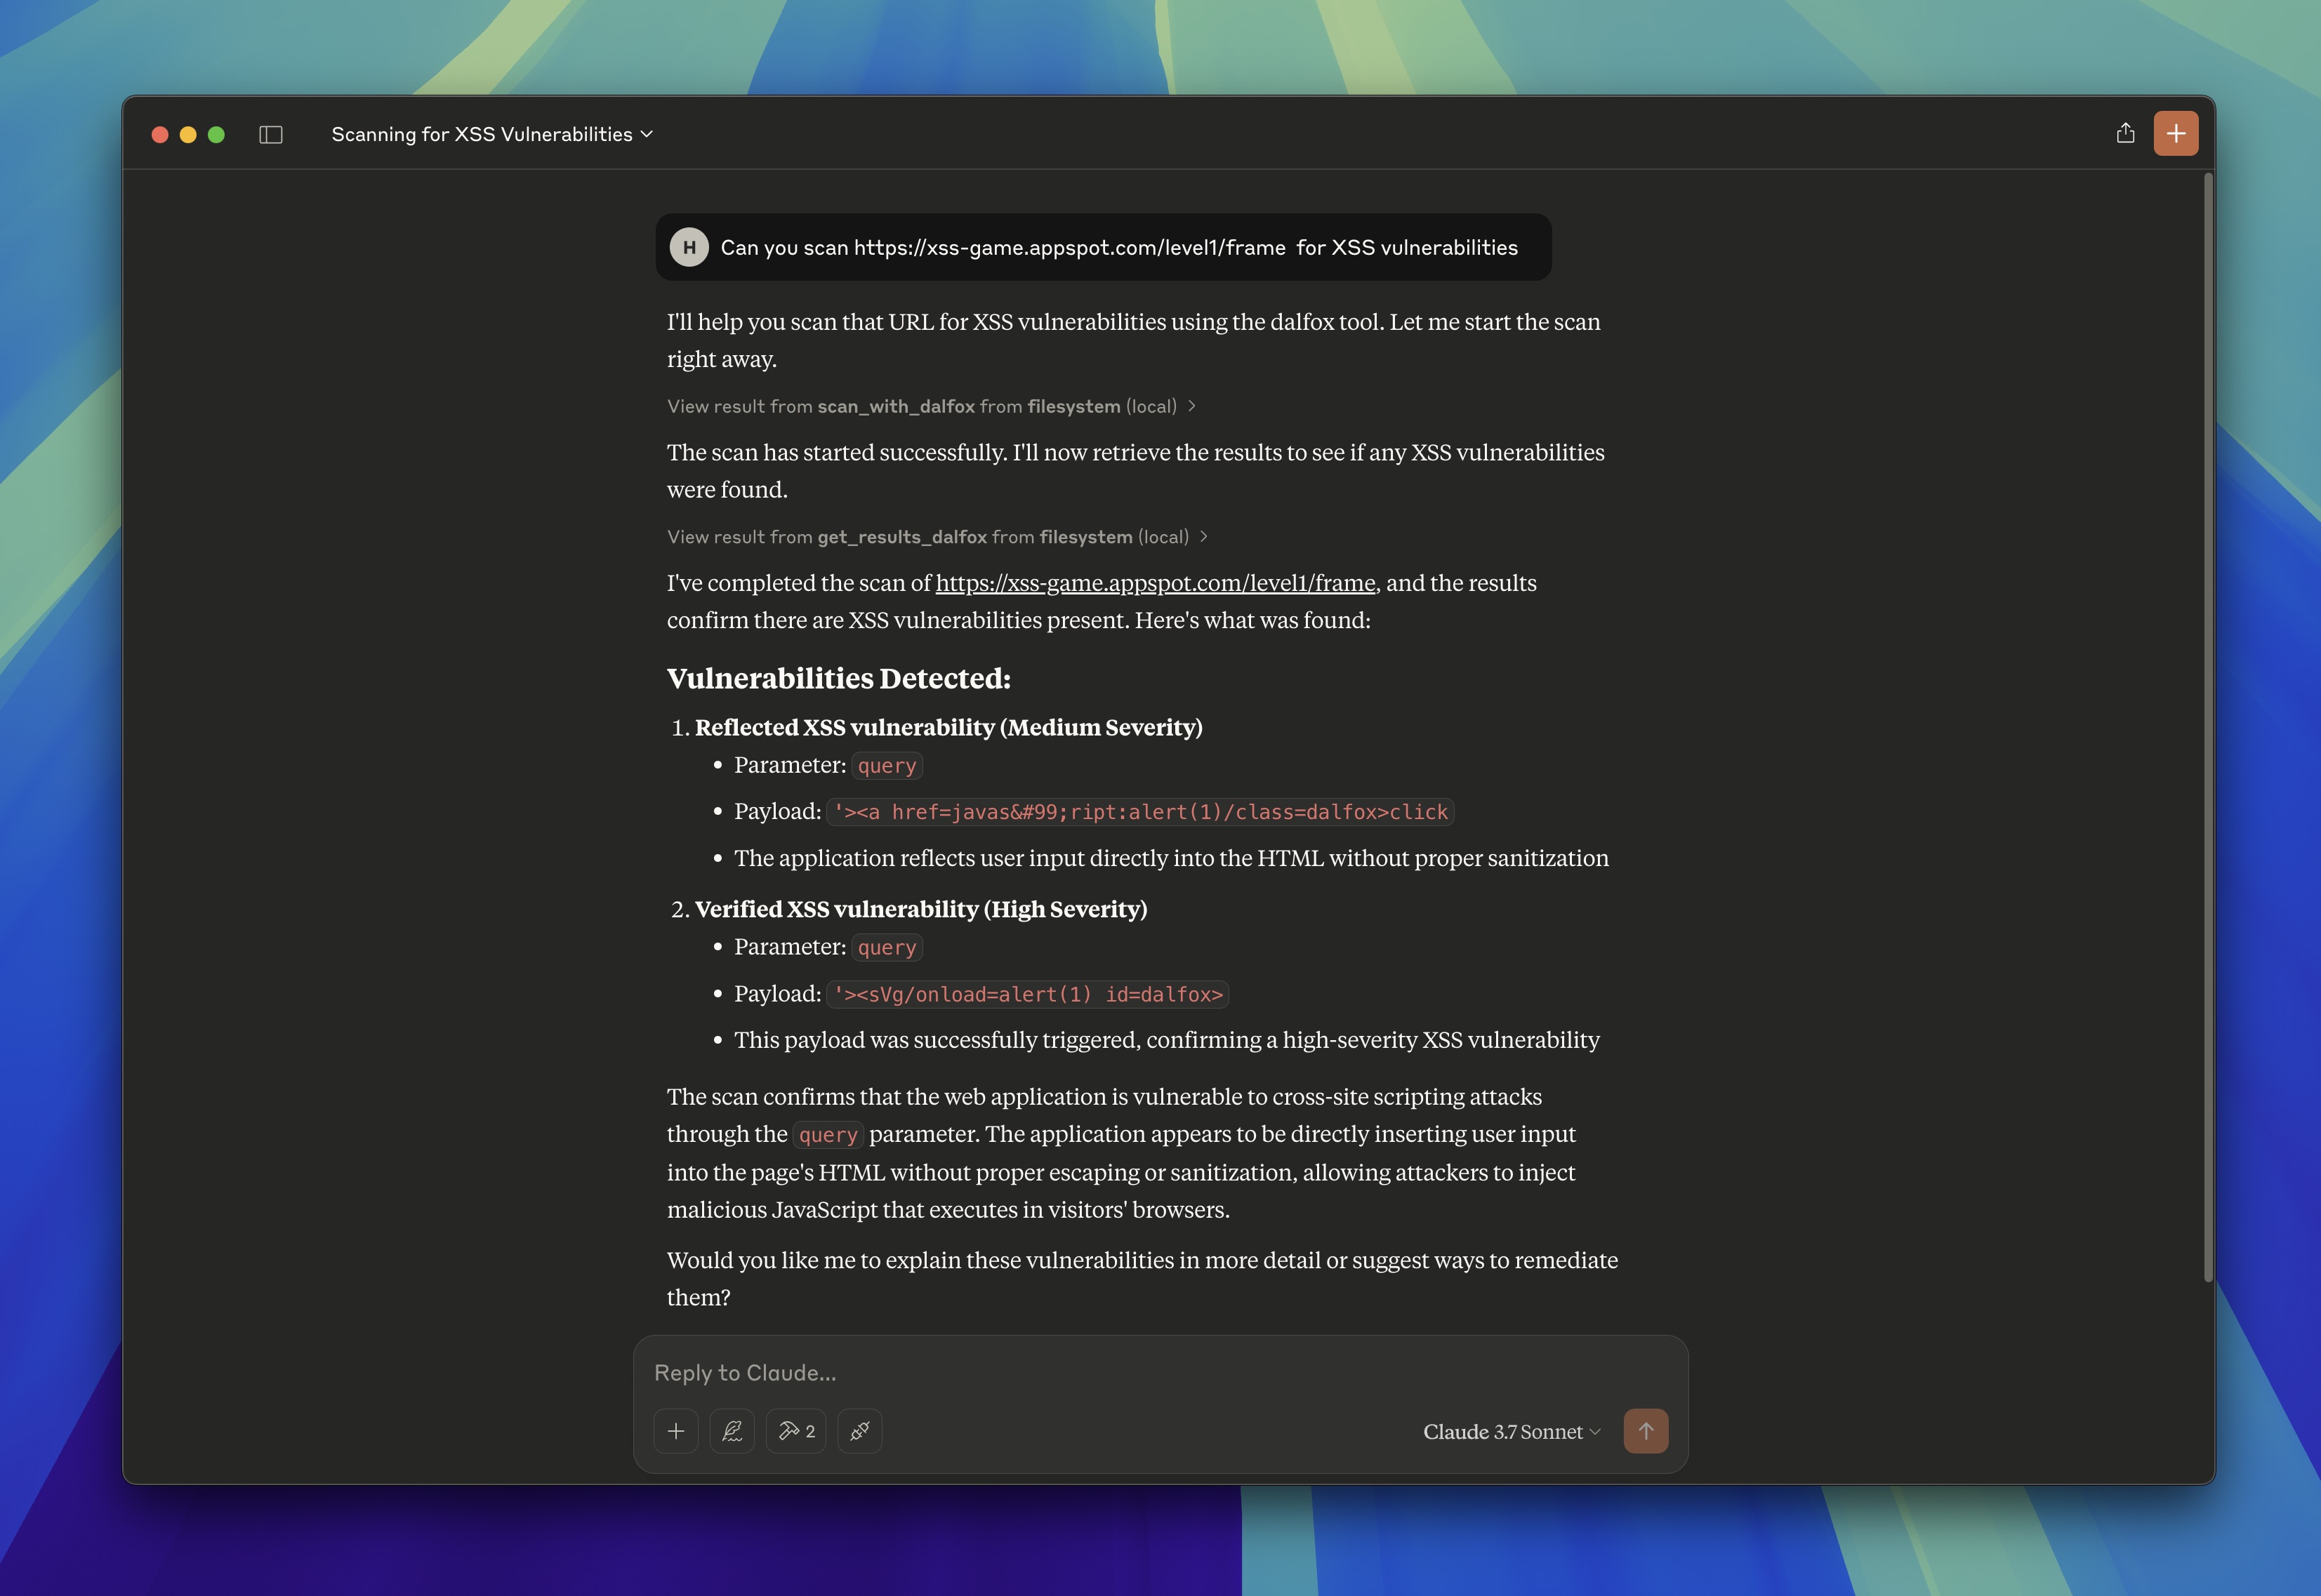
Example Claude Desktop Usage
Advanced MCP Integration
Custom Scan Options
When using Dalfox through MCP, you can specify various scan options by providing them in your request:
"Scan https://example.com with Dalfox using the following options:
- Custom headers with an authorization token
- Cookie-based authentication
- A blind XSS callback URL"
The AI assistant will translate these requests into the appropriate Dalfox commands.
Use Cases
Security Code Review
Ask your AI assistant to review code and then scan endpoints for vulnerabilities:
"Review this controller code and identify any potential XSS vulnerabilities.
Then use Dalfox to scan the corresponding endpoints."
Vulnerability Research
Have the AI assistant help with targeted testing:
"I found a potential XSS vulnerability in the search parameter.
Can you use Dalfox to verify if it's exploitable?"
Best Practices
- Keep Dalfox Updated: Ensure you’re using the latest version for the most current security checks
- Validate Results: Always verify AI-interpreted scan results manually for critical systems
- Rate Limiting: Be mindful of scan frequency to avoid overwhelming target systems
- Context Matters: Provide AI assistants with sufficient context about targets for more effective scanning
- Security Awareness: Remember that scan results might contain sensitive information